Page 13 - Shimadzu Autograph AGS-X Series
P. 13
Screw-Type Flat Grips <SCG>  Plastics Rubber Textiles  Cloth  Paper
                                   Standard grip face    Upper grip
                Grip capacity    Clearance  Grip width  Grip length   weight
                          Grip face
                                   (mm)    (mm)    (mm)    (kg)
                  5 kN            0 to 16  60      50      2
                         File teeth
                  1 kN            0 to 15  50      30      0.7
                  50 N     Flat   0 to 14  35      25      0.3
               Parallel Tightening Grips         Plastics Metals Lumber  Screw-Type Flat Grips  Parallel Tightening Grips
                          Size (mm)  Grip face   Face   Upper grip
                Grip capacity      width and length   clearance    weight
                          W    L      (mm)      (mm)      (kg)
                 300 kN  574   440    60, 90    0 to 60   170
                 100 kN  446   310    40, 70    0 to 40    90
               * Requires a separate hydraulic unit
               * Optional compression jigs and bending jigs that can be connected directly to the grips are also available.

                Compression plate   Plastics Metals Rubber  Lumber Cement
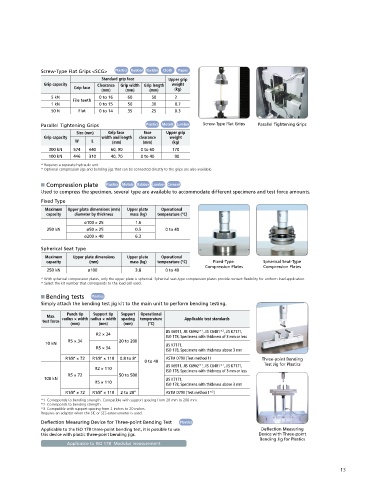
               Used to compress the specimen, several type are available to accommodate different specimens and test force amounts.
               Fixed Type
                Maximum  Upper plate dimensions (mm)  Upper plate   Operational
                capacity  diameter by thickness  mass (kg)  temperature (°C)
                             ø100 × 25        1.6
                 250 kN       ø50 × 25        0.5       0 to 40
                             ø200 × 40        6.3

               Spherical Seat Type
                Maximum  Upper plate dimensions  Upper plate   Operational
                capacity       (mm)         mass (kg)  temperature (°C)  Fixed-Type     Spherical Seat-Type
                                                                     Compression Plates  Compression Plates
                 250 kN       ø100            3.8       0 to 40
               * With spherical compression plates, only the upper plate is spherical. Spherical seat-type compression plates provide contact  exibility for uniform load application.
               * Select the kit number that corresponds to the load cell used.

                Bending tests  Plastics
               Simply attach the bending test jig kit to the main unit to perform bending testing.
                       Punch tip  Support tip  Support  Operational
                Max.
               test force  radius × width radius × width  spacing   temperature   Applicable test standards
                        (mm)      (mm)    (mm)    (°C)
                                                                    1
                                                        JIS K6911, JIS K6902* , JIS C6481* , JIS K7171,
                                                                           2
                                 R2 × 34
                                                        ISO 178, Specimens with thickness of 3 mm or less
                       R5 × 34          20 to 200
                10 kN                                   JIS K7171,
                                 R5 × 34                ISO 178, Specimens with thickness above 3 mm
                       R1/8″ × 72  R1/8″ × 110  0.8 to 8″  ASTM D790 (Test method 1)    Three-point Bending
                                                 0 to 40
                                                                    1
                                                                           2
                                                        JIS K6911, JIS K6902* , JIS C6481* , JIS K7171,   Test Jig for Plastics
                                R2 × 110                ISO 178, Specimens with thickness of 3 mm or less
                       R5 × 72          50 to 500
                100 kN                                  JIS K7171,
                                R5 × 110
                                                        ISO 178, Specimens with thickness above 3 mm
                       R1/8″ × 72  R1/8″ × 110  2 to 20″  ASTM D790 (Test method 1* )
                                                                       3
               *1  Corresponds to bending strength. Compatible with support spacing from 20 mm to 200 mm.
               *2  Corresponds to bending strength.
               *3  Compatible with support spacing from 2 inches to 20 inches.
               Requires an adaptor when the SIE or SES extensometer is used.
               Deflection Measuring Device for Three-point Bending Test  Plastics
               Applicable to the ISO 178 three-point bending test, it is possible to use   Deflection Measuring
               this device with plastic three-point bending jigs.                      Device with Three-point
                                                                                       Bending Jig for Plastics
                       Applicable to ISO 178  Modulus measurement
                                                                                                                  13

