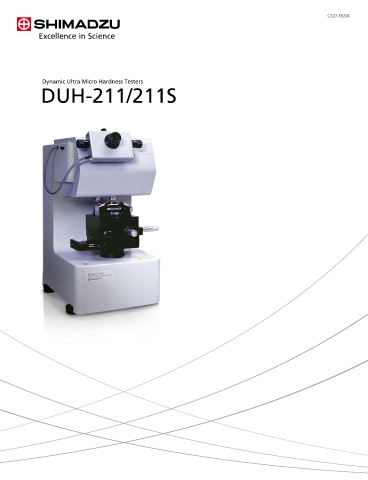
Page 1 - Shimadzu DUH-211/
P. 1
C227-E024C


 Example of Dynamic Ultra Micro Handness Tester DUH-211/211S Systems  DUH-211/211S


               Dynamic Ultra Micro Hardness Testers
               DUH-211/211S

 Electric X–Y  High-Temperature  P/N 347-24700-41 (50 Hz)
 Stage System  P/N 347-24625-41  Unit System        347-24700-42 (60 Hz)

 • Stroke  X-axis, Y-axis ±25 mm  • Temperature   From 30°C above room temperature to 250°C
 (There is the function that the slides 50 mm toward the X-axis.     Setting Range  (temperature control is possible at 50°C or higher)
 All stroke of X-axis are 100 mm)  • Accuracy  Within ±2°C of set temperature
 • Resolution  0.001 mm  • Total Magnification  ×400 (objective lens: ×40; eyepiece: ×10)
 • Drive method  Ball screw actuated by stepping motor     of Microscope
 • Utilities  100V 50/60 Hz
 * Compatible to electric Z system.
 * High-temperature systems are only available when ordering the main unit.

 Related Products


 Micro Compression Testing Machine  Micro Hardness Tester  Fully Automatic Micro Hardness Tester
 MCT Series  HMV-G21  HMV-G-FA
 This machine is used to measure the compressive   This type of hardness tester automatically   By including an automatic measurement function,
 strength of single particles (of diameter 1 µm or   measures length using a built-in CCD camera. The   an electric XYZ stage function, and an auto-focus
 greater). The compressive strength of ceramics,   automatic measurement function provides easy   function to a micro Vickers hardness tester used
 plastics, pigments, food products, and   and worry-free measurements without human   for evaluating the hardness of paint or plating
 pharmaceuticals can be measured at a particulate   error. The innovative G-frame provides a broad   coatings or surface-hardened layers, this automatic
 matter stage, providing data that is closely related   work area, dramatically improves operability, and   hardness tester is able to perform a continuous
 to the final application of these substances.  easily accommodates long samples or other   series of highly precise measurements
 samples with a large area.  automatically.
 • Loading  Electromagnetic force   The automatic lens switching function
    Method  9.807 mN to 1.961 N or   automatically switches to the magnification   • Test Force Range  98.07 mN to 19.61 N
 9.807 mN to 4.903 N  appropriate for the given indentation size, which   (Optionally from 9.807 mN)
 • Indenter  Diamond, cone-shaped,   means anyone can operate the system accurately.  • Electric XY Stage  Stroke: ±25 mm
 50-µmø diameter  Resolution: 0.001 mm
 • Displacement   Differential transformer   • Test Force Range  98.07 mN to 19.61 N  • Electric Z Stage  Stroke: 40 mm
    Measurement  0 µm to 10 µm or 0 µm to 100 µm  (Optionally from 9.807 mN)  Resolution: 0.001 mm
 • Optical Monitor Equipped with ×500 microscope  • Indentation  Approx. 0.3 sec.
    Measurement Time
 • Equipped with revolving electric turret (HMV-G21T)


 Windows is a registered trademark of Microsoft Corporation in the US and other countries.


 For Research Use Only. Not for use in diagnostic procedures.
 This publication may contain references to products that are not available in your country. Please contact us to check the availability of these
 products in your country.
 Company names, products/service names and logos used in this publication are trademarks and trade names of Shimadzu Corporation, its
 subsidiaries or its affiliates, whether or not they are used with trademark symbol “TM” or “®”.
 Third-party trademarks and trade names may be used in this publication to refer to either the entities or their products/services, whether or not
 they are used with trademark symbol “TM” or “®”.
 Shimadzu disclaims any proprietary interest in trademarks and trade names other than its own.
 www.shimadzu.com/an/  The contents of this publication are provided to you “as is” without warranty of any kind, and are subject to change without notice. Shimadzu
 does not assume any responsibility or liability for any damage, whether direct or indirect, relating to the use of this publication.
 © Shimadzu Corporation, 2018
 First Edition: June 2006, Printed in Japan 3655-11801-10ANS

