Page 5 - Shimadzu HMV-G Series
P. 5
Select the System to

 Suit the Situation

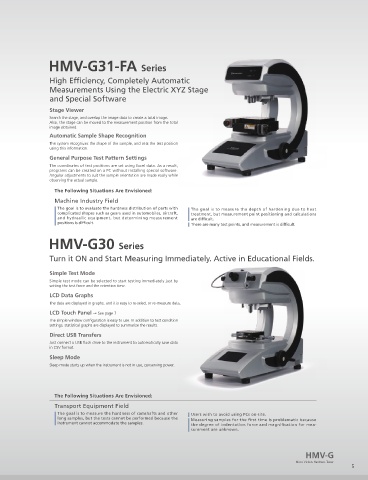
                 HMV-G31-FA Series

                 High Ef ciency, Completely Automatic
                 Measurements Using the Electric XYZ Stage
                 and Special Software
                 Stage Viewer
                 Search the stage, and overlap the image data to create a total image.
 HMV-G31 Series  Also, the stage can be moved to the measurement position from the total
                 image obtained.
                 Automatic Sample Shape Recognition
 Standardized automatic length   The system recognizes the shape of the sample, and sets the test position
 measurement function using a   using this information.
 digital camera built into a novel   General Purpose Test Pattern Settings
 G frame         The coordinates of test positions are set using Excel data. As a result,
                 programs can be created on a PC without installing special software.
                 Angular adjustments to suit the sample orientation are made easily while
                 observing the actual sample.
 G Frame G31 G30  FA  Intelligent Software G31 FA
                   The Following Situations Are Envisioned:
 The corner-less, elegant frame disperses   The software automatically sets the optimal indentation test force from the
 the load uniformly for stability, and   anticipated hardness and anticipated indentation depth.  Machine Industry Field
 extends in the depth direction to   Further, the software automatically sets the optimal lens magni cation from
 expand the work space and improve   the anticipated hardness.  The goal is to evaluate the hardness distribution of parts with   The goal is to measure the depth of hardening due to heat
 operability. Additionally, because the   complicated shapes such as gears used in automobiles, aircraft,   treatment, but measurement point positioning and calculations
 central part of the frame is open, long   Automatic High Speed Readings G31 FA  ˠ See page 6  and hydraulic equipment, but determining measurement   are dif cult.
 narrow samples can now be measured   positions is dif cult.
 as is.  One sample can be read in 0.3 seconds. (for monochrome cameras only)  There are many test points, and measurement is dif cult.
 Compact Design with a Built-in Digital Camera G31 FA
 Multi Turret (D Type) G31 G30 FA
 The digital camera is built in, so the design is compact.
 Two indenters and four lenses can be attached.
 Automatic Lens Switching (T Type) G31 FA  HMV-G30 Series
 User-Designated Test Force Settings G31 G30  FA
 After the automatic reading is taken, the lens is automatically switched to
 Using electromagnetic control, tests can be performed with a user-designated   suit the size of the indentation.  Turn it ON and Start Measuring Immediately. Active in Educational Fields.
 test force from 9.807 mN (HV0.001) to 19.61 N (HV2). (Minimum increment
 of 9.807 mN)  Reading of Scored Surfaces G31 FA
 Test Conditions Assist Function G31 G30 FA  The software can read not only samples with a mirror  nish, but also   Simple Test Mode
 samples scored by etching.
 This function can select the optimal lens from the anticipated hardness, or   Simple test mode can be selected to start testing immediately just by
 determine the optimal test force from the anticipated indentation depth and   Routine Inspection Graphs G31 FA  setting the test force and the retention time.
 hardness.
 The average hardness per lot is displayed in a graph, so the user can check   LCD Data Graphs
 Fracture Toughness Measurements G31 G30 FA  changes in hardness.  The data are displayed in graphs, and it is easy to re-select or re-measure data.
 $PMPS $BNFSB .PEFM
 $PMPS $BNFSB .PEFM
 The system can measure the crack length when the indenter makes an   G31 FA  ˠ See page 7
 indentation, so the fracture toughness of brittle materials can be measured.  LCD Touch Panel ˠ See page 7
 Models with color cameras are available.
 Measurement Mode Settings  G31 G30 FA  64# $PNNVOJDBUJPO XJUI B (FOFSBM 1VSQPTF 1$  The simple window con guration is easy to use. In addition to test condition
 64# $PNNVOJDBUJPO XJUI B (FOFSBM 1VSQPTF 1$ G31
                 settings, statistical graphs are displayed to summarize the results.
 The user can select standard testing, in which the indentation is read after
 each test, or consecutive testing, in which the reading is taken after a number   Connect to a PC with just two USB cables. (Excluding the models with an   Direct USB Transfers
 of test cycles.  electric stage)
 &MFDUSJD .JDSPNFUFS  0QUJPOBMMZ "WBJMBCMF   G31 ˠ See page 9  Just connect a USB  ash drive to the instrument to automatically save data
                 in CSV format.
 After purchasing the HMV-G31/HMV-G21, if the electric micrometer option
 is subsequently added, the simpli ed electric XY stage function can be used.  Sleep Mode
                 Sleep mode starts up when the instrument is not in use, conserving power.
 The Following Situations Are Envisioned:
 Surface Processing and Etching Fields  Solar Cell Field
 There is a shortage of trained users, and the data varies signi -  The goal is to evaluate the hardness of metal foils such as those
 cantly depending on the analyst.  used in solar cell wiring, but the foils cannot be measured because   The Following Situations Are Envisioned:
 There are scratches on the surfaces of lead frames and mechani-  the test forces are too great.
 cal parts, so measuring indentation lengths is dif cult.  The goal is to evaluate not only Micro Vickers hardness, but also Knoop   Transport Equipment Field
 Statistical controls should be implemented to evaluate quality   hardness and other hardness types, but switching indenters is dif cult.  The goal is to measure the hardness of camshafts and other   Users wish to avoid using PCs on-site.
 stability, but there are not enough personnel.  The goal is to evaluate a variety of materials ranging in quality from   long samples, but the tests cannot be performed because the
 The goal is to measure a range of samples, even those with   hard to soft. However, this is dif cult because test forces are inap-  instrument cannot accommodate the samples.  Measuring samples for the  rst time is problematic because
                                                                the degree of indentation force and magni cation for mea-
 unknown hardness levels.  propriate, and the lens magni cation may not suit the indentation.  surement are unknown.
                                                                                                      HMV-G
                                                                                                   Micro Vickers Hardness Tester
 4                                                                                                                   5

