Page 5 - Shimadzu PDA-8000
P. 5
More Precise Analysis Achieved with a High-Resolution Spectrometer
            More Precise Analysis Achieved with a High-Resolution Spectrometer
            Using a Paschen-Runge Spectrometer with the focal length of 1000mm, and a diffraction grating suitable for each of ferrous or
            non-ferrous application, PDA-8000 offers high-resolution measurements with less spectral interference over a wide wavelength
            range.


            Stable and Proven Vacuum Spectrometer
            Stable and Proven V     acuum Spectrometer
            Oxygen inside the spectrometer needs to be removed because it absorbs spectral lines in the vacuum-ultraviolet wavelength
            range, and some important elements in material analysis have spectral lines in this range, including Phosphorus, Sulfur and
            Nitrogen.
            PDA-8000 uses a proven vacuum monochromator to provide stable spectroscopic analysis.


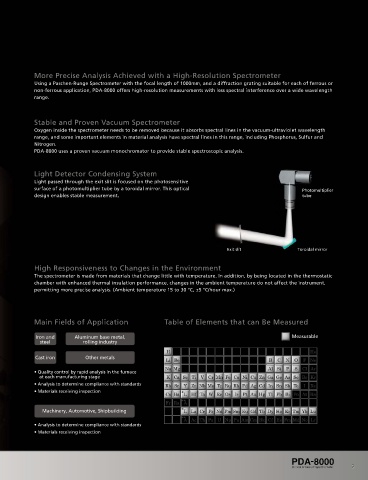
            Light Detector Condensing System
            Light Detector Condensing System
            Light passed through the exit slit is focused on the photosensitive
            surface of a photomultiplier tube by a toroidal mirror. This optical                     Photomultiplier
            design enables stable measurement.                                                       tube


                                                                            Exit slit               Toroidal mirror

            High Responsiveness to Changes in the Environment
            High Responsiveness to Changes in the Environment
            The spectrometer is made from materials that change little with temperature. In addition, by being located in the thermostatic
            chamber with enhanced thermal insulation performance, changes in the ambient temperature do not affect the instrument,
            permitting more precise analysis. (Ambient temperature 15 to 30 °C, ±5 °C/hour max.)


                                                       Table of Elements that can Be Measured
            Main Fields of Application                 Table of Elements that can Be Measured
            Main Fields of Application
             Iron and     Aluminum base metal,                                                    Measurable
              steel         rolling industry

             Cast iron       Other metals

            • Quality control by rapid analysis in the furnace
                at each manufacturing stage
            • Analysis to determine compliance with standards
            • Materials receiving inspection


               Machinery, Automotive, Shipbuilding

            • Analysis to determine compliance with standards
            • Materials receiving inspection


                                                                                                                     5

