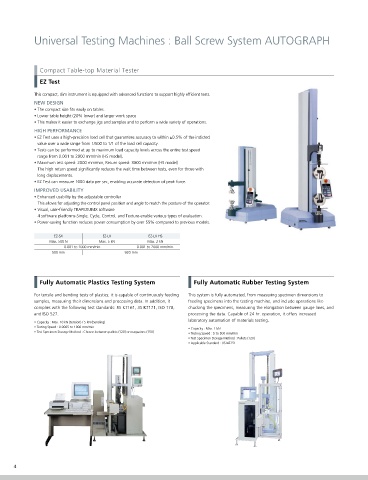
Page 4 - Testing and Inspection Machines
P. 4
Universal Testing Machines : Ball Screw System AUTOGRAPH


                      Compact Table-top Material Tester                                                                                        Non-contact Type Video Extensometer  Automatic Extensometer         High-Speed Video Camera

                      EZ Test                                                                                                                  TRViewX                           SIE-560A/560SA                    HyperVision HPV-X2

                    This compact, slim instrument is equipped with advanced functions to support highly efficient tests.                      TRViewX non-contact type video extensometers that has   This extensometer is designed for high-precision   This camera is capable of ultra-high-speed image
                    NEW DESIGN                                                                                                                a complete synchronization with Shimadzu testing   measurement of the elongation of specimens such as   capture up to 1,000,000 fps, and supports 312 ×
                                                                                                                                              software “TRAPEZIUM X” can measure not only the   metals or plastics over a wide displacement range   260 (approx. 81,000) pixel resolution at all image
                    • The compact size fits easily on tables.
                    • Lower table height (20% lower) and larger work space                                                                    elongation of specimen but also the transverse strain can   extending from the elastic region (micro displacements)   capture speeds. Moreover, four cameras can be
                                                                                                                                              be measured. The non-contact extensometer has no   to breaking point (large displacements). All operations   controlled from a single PC to enable completely
                    • This makes it easier to exchange jigs and samples and to perform a wide variety of operations.
                                                                                                                                              possibility to damage test specimen, therefore wide range   can be performed via the software; mounting or   synchronized image capture.
                    HIGH PERFORMANCE                                                                                                          of materials can be measured. Thin films, elastomeric   removing the extensometer arms to/from the specimen   • Resolution : 312 (H) × 260 (V) pixels
                    • EZ Test uses a high-precision load cell that guarantees accuracy to within ±0.5% of the indicted                        materials, metals, etc... It is capable of measuring with   and gauge length setting are done automatically.  • Image Capture Speed : 30 to 1 million fps
                     value over a wide range from 1/500 to 1/1 of the load cell capacity.                                                     precision equivalent JIS B 7741, Class 0.5.  • Measurement Range : Max. (560 mm - gauge length)  • Number of Stored Recordings : 100
                    • Tests can be performed at up to maximum load capacity levels across the entire test speed                                                                 • Measurement Precision : 560S 1 µm or 0.5% (JIS B7741 Class 0.5)
                                                                                                                                              • Type: Optical Non-Contact, Gage Mark Detection
                     range from 0.001 to 2000 mm/min (HS model).                                                                              • Gauge Length: Any arbitrary length within camera field of vision     560 2.5 µm or 0.5% (JIS B7741 Class 1)
                    • Maximum test speed: 2000 mm/min, Return speed: 3000 mm/min (HS model)                                                   • Camera Field of Vision:         • Gauge Length : 560S 50 mm (can be changed optionally)

                                                                                                                                                                                        560 10 to 550 mm
                       The high return speed significantly reduces the wait time between tests, even for those with                              55 to 800 mm (Single camera) / 120 mm (Double camera1)
                                                                                                                                                 500 to 800 mm (Double camera2)
                     long displacements.                                                                                                      • Measurement Precision: ±1.5 µm or ±0.5% of indicated value
                    • EZ Test can measure 1000 data per sec, enabling accurate detection of peak force.
                    IMPROVED USABILITY
                    • Enhanced usability by the adjustable controller
                       This allows for adjusting the control panel position and angle to match the posture of the operator.
                    • Visual, user-friendly TRAPEZIUMX software
                       4 software platforms-Single, Cycle, Control, and Texture-enable various types of evaluation.
                    • Power-saving function reduces power consumption by over 55% compared to previous models.

                          EZ-SX           EZ-LX           EZ-LX HS
                         Max. 500 N      Max. 5 kN       Max. 2 kN
                              0.001 to 1000 mm/min.   0.001 to 2000 mm/min.
                          500 mm                  920 mm
                                                                                                                                              Servopulser Servo Dynamic Systems


                      Fully Automatic Plastics Testing System            Fully Automatic Rubber Testing System                                 EHF-LV Series                     EHF-EV Series                     EHF-UV Series

                    For tensile and bending tests of plastics, it is capable of continuously feeding   This system is fully automated, from measuring specimen dimensions to   This multifunctional materials testing machine offers   This electro-hydraulic materials testing machine   Besides standard test specimens, this
                    samples, measuring their dimensions and processing data. In addition, it   feeding specimens into the testing machine, and include operations like   fully digital groundbreaking servo control that opens   performs a wide range of strength testing   multifunctional fatigue testing machine is even
                    complies with the following test standards: JIS K7161, JIS K7171, ISO 178,   chucking the specimens, measuring the elongation between gauge lines, and   the way to a new generation of fatigue testing   applications for new materials, from dynamic to   able to perform fatigue tests on structural
                    and ISO 527.                                       processing the data. Capable of 24 hr. operation, it offers increased   systems. With this achievement of combining   static testing. Using the latest computer-control   members or actual parts. This upper-actuator
                                                                       laboratory automation of materials testing.                            completely digital control with state-of-the-art   system, it allows real-time calculation-based   type system offers wide testing space, which is
                    • Capacity : Max. 10 kN (tension) / 5 kN (bending)
                    • Testing Speed : 0.0005 to 1000 mm/min            • Capacity : Max. 1 kN                                                 technology, all aspects of performance are improved,   control during tests, data processing and more.  ideal for various environmental testing, such as in
                    • Test Specimen Storage Method : Choose between pallets (120) or magazines (150)
                                                                       • Testing Speed : 5 to 500 mm/min                                      from precision and reliability to expandability.  • Max. Test Force : Dynamic 50, 100 or 200 kN  a corrosion chamber or thermostatic chamber.
                                                                       • Test Specimen Storage Method : Pallets (120)                         • Max. Test Force : Dynamic 5, 10 or 20 kN  • Max. Amplitude : 25 mm   • Max. Test Force : Dynamic 50, 100 or 200 kN
                                                                       • Applicable Standard : JIS K6251                                                                        • Measurement Control Method : Fully digital PID control with 2
                                                                                                                                              • Max. Amplitude : 25 mm                                            • Max. Amplitude : 25 mm
                                                                                                                                              • Measurement Control Method : Fully digital PID control with 2  degrees of freedom ; Includes real-time gain adjustment and   • Loading Unit Type : Upper actuator type with “T” groove in table
                                                                                                                                              degrees of freedom ; Includes real-time gain adjustment and   auto- tuning features  • Waveforms : Sine, triangular, square, ramp, and haversine waves
                                                                                                                                              auto- tuning features                                               • Control Parameters : Test force and stroke


                                                                                                                                                                                                      Testing and Inspection Machines
             4                                                                                                                                                                                                                           General Brochure  5

